In this article, there will be very little talk, and mostly just screenshots of guided steps. From Basic Account to Trial of the Business Plan.
Then, I’ll show you examples from real sites, with hints and ideas.
Let’s go:
We begin by going to WordPress -> Squirrly -> Rankings. If you have a basic account, this is what you will see.
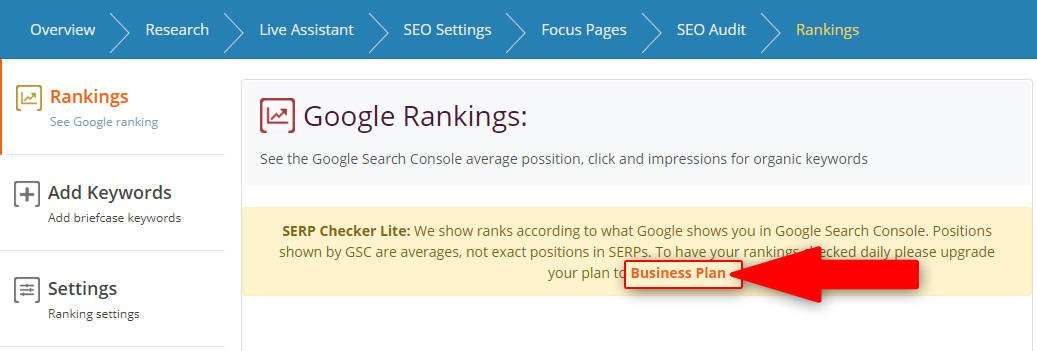
Now let’s make the switch to Business. Click on Business Plan. As shown in the screenshot above.
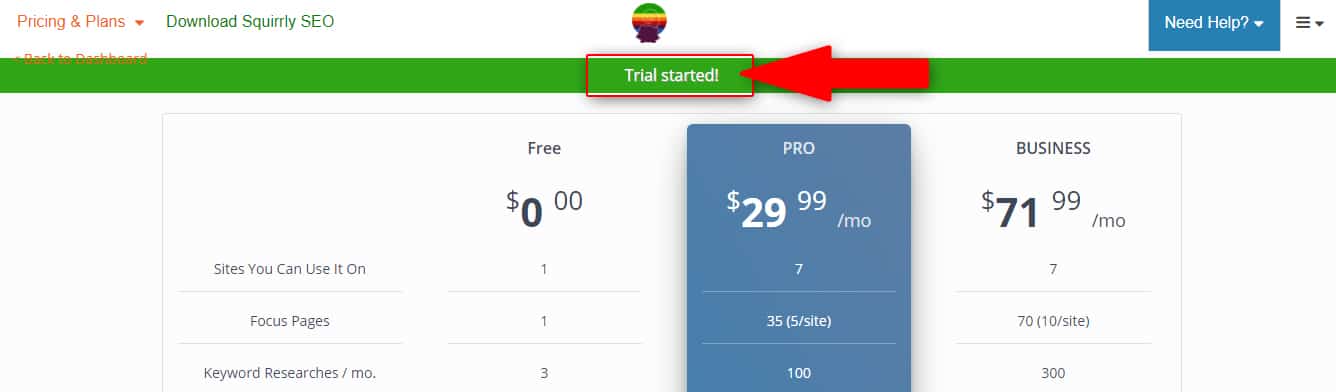
This will take you to a page where you’ll see more details about all Squirrly Plans.
Look at the Business Plan, what it includes and what makes it different from the other plans that we offer. The business plan works awesome with the new Squirrly SEO.
I’ll show you all about it in this guided tour.
You’ll get to see details about the benefits and features. Remember: Just like the PRO plan, the Business plan covers 7 WordPress sites.
Scroll down until you see the Start 7 Days Trial button.

Click on Start 7 Days Trial. After the trial is over, everything in your account goes 100% back to normal.

Click Ok, and your 7-days Trial will begin. You can check to see how many days of the trial period you have left here.
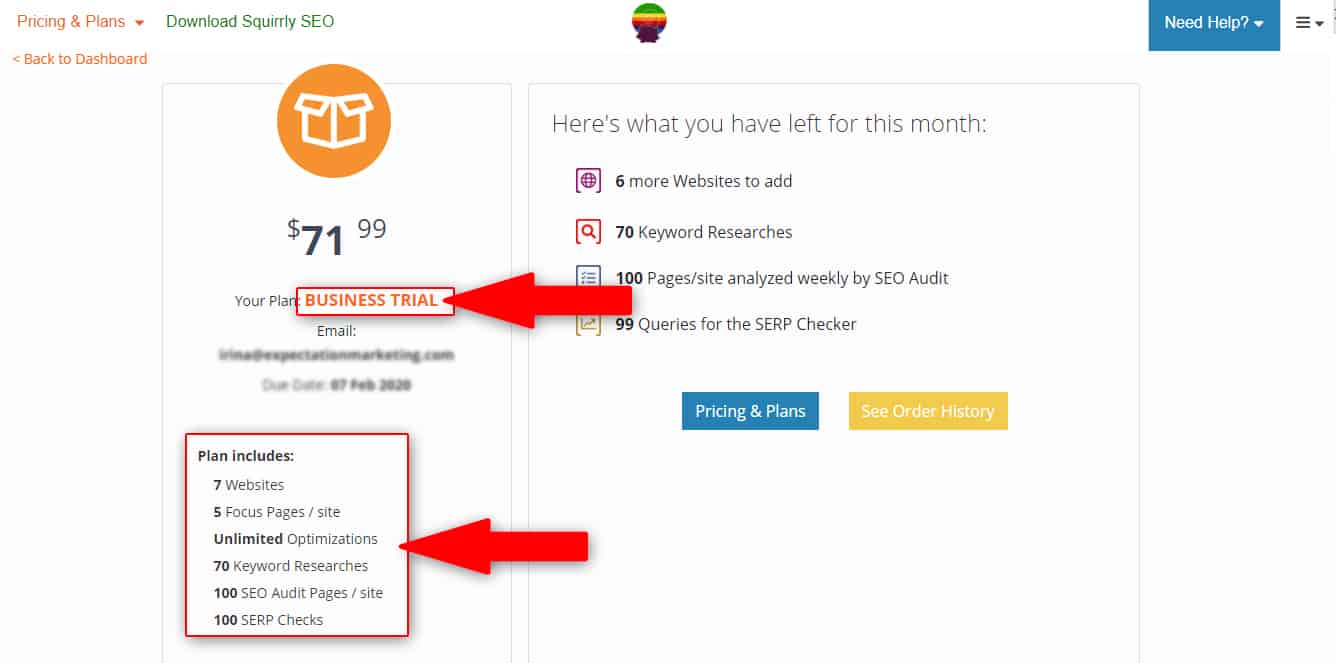
You can see that you’ve activated the Business trial in your Account info where you have access to other useful information about your current plan as well.
Back to your WordPress Dashboard. Let’s see what you can do now that you have the Trial. Refresh the wp admin to see new data.
Squirrly will identify keywords that you’ve used in your articles.
As opposed to OTHER solutions, Squirrly SEO will know exactly what you’ve already used and place data in automatically. You’ll not waste any more time with manual labor for this part of SERP checking.
You can also add new keywords for which you want to monitor the Rankings. I’ll show you how to do it; it’s very easy.
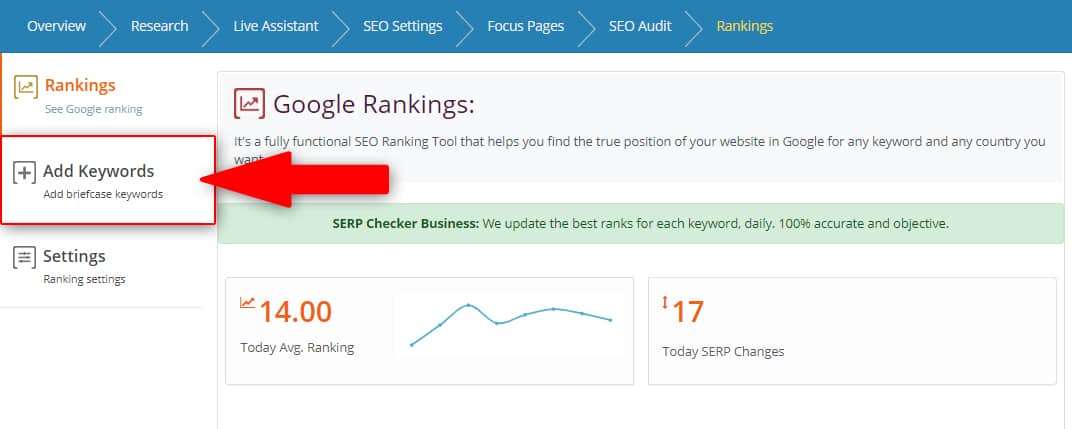
In the Rankings section, click on Add Keywords/Add Briefcase Keywords.
You are now in the Research section of the plugin, the Briefcase panel. From here, you can add keywords and start keeping track of how they rank.

Click on the three dots next to keyword info. Click on Send to Rank Checker. This will automatically let Squirrly know it should begin tracking the ranking for that keyword.
![]()
Next up, we’ll talk more about how you can easily keep track of your rankings using the Business Plan.
Once you’ve added keywords, you will start to see your TRUE Google position for those keywords in the Rankings section.

You can also choose to remove keywords. Once you do that, Squirrly will no longer monitor the Google Rankings of that keyword. You’re basically telling Squirrly NOT to waste precious Business Level queries on useless keywords.
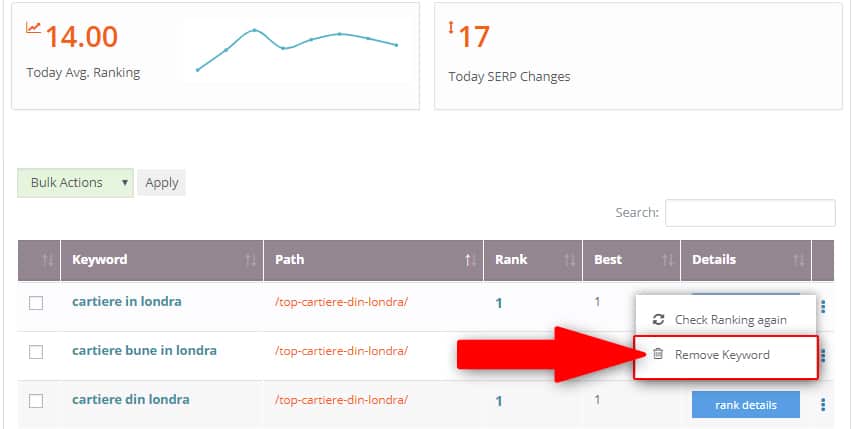
Click on Rank details to see powerful performance analytics.
![]()
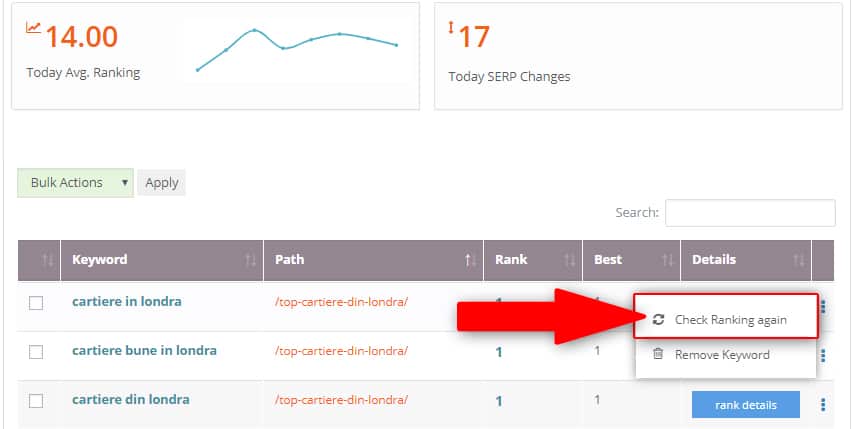
Squirrly updates the best ranks for each keyword daily and also shows you the Average Ranking of your site for that particular day. You can see that the site I’ve used for this tour ranks #14 on average with pages and keywords.

Squirrly also shows you the total number of SERP changes, meaning you can see how many pages have had changes in their ranking that day. For the site used for this example, there are 17 ranking changes that happened recently.

If you click on that arrow, Squirrly will only show you the pages and keywords that either went up or down in SERPs.

PRO TIP:
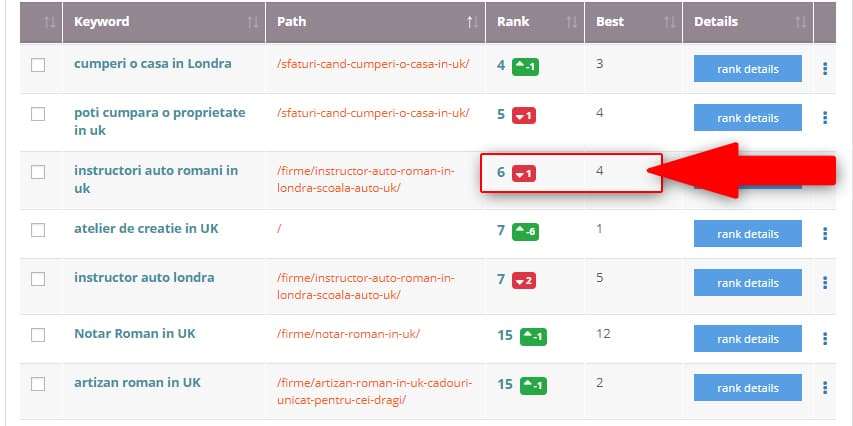
Green means UP. Red means DOWN. And Squirrly also shows you how many positions it went up or down.

Plus, you can compare the Current Rank with the best Rank achieved.
Then, once you’ve studied the changes, choose to see all ranks again by clicking on Show All.

Squirrly also lets you refresh the Ranking information on demand by clicking on Check Ranking again. Keep in mind that refreshing the information uses up your available queries for the SERP checker.
Now, I want to show you one more thing here.
If you look at the bottom of the screenshot below, you’ll see 97 items that could be ranked. If I click on 14, however, it will show me only the keywords that this site currently ranks for now.

Let’s talk about your settings and the customization options.
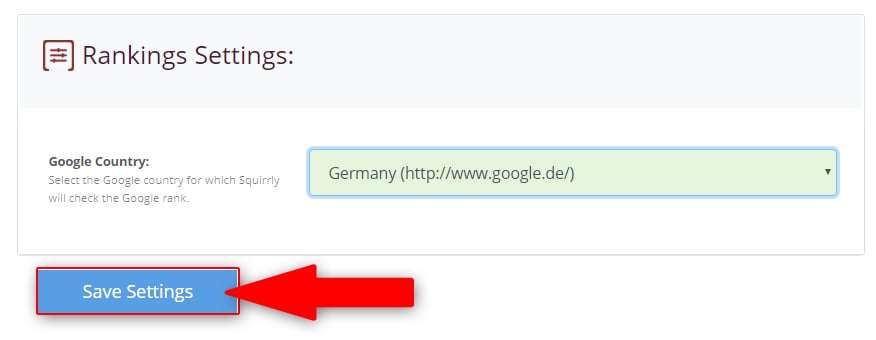
Here, you can select the country for which you want Squirrly to check the Google Rank. If you choose Google.de, for instance, Squirrly will only check you ranks for Germany.

By default, this is set to Google.com. You can leave it as is if most of your audience uses Google.com (Global Search). If you run a local business, however, customizing this section can be particularly useful.
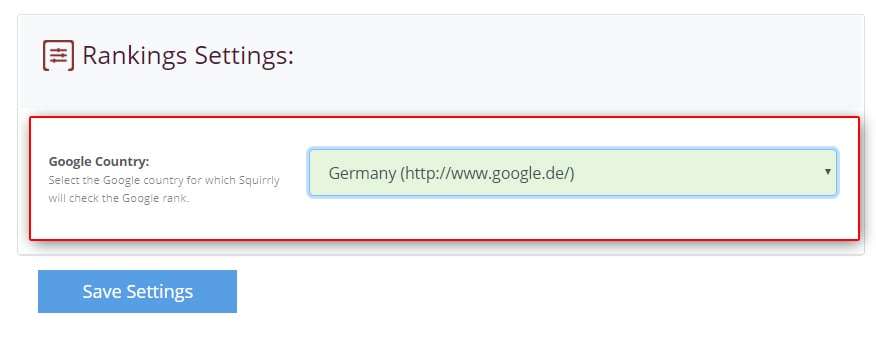 Click on Save Settings to save your desired setup (you can come back and change your preferences later on).
 Better options and more customizations will appear once you pay for the Business Plan.
During the Business Plan trial mode, Squirrly API will bring your ranking information for a limited number of Queries/day. Many more when you buy. You get a lot of options to customize how you want them used.
There’s a lot of stuff you can control.
Now, that was the quick guide.
Pam Pam!
Before you head out, though, here’s a look at the Squirrly Dashboard (which you can access by clicking on Overview).
As you can see from the screenshot below, Squirrly also offers you precious stats about your Google ranks – right in your Dashboard.
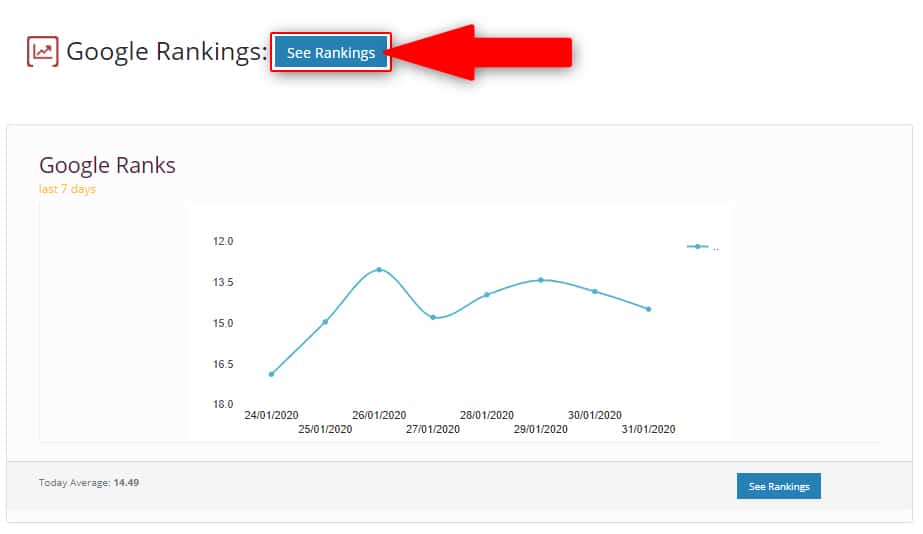 To see detailed Information about your Rankings evolution, simply click on See Rankings (takes you to the main Rankings panel).
Keep Ranking!
Thanks for taking this guided tour. Try Business Today.